Cloud Hosting
The FindMyCat cloud hosting can be done either using a Cloud Provider or you can host it yourself at home on a small computer like Raspberry Pi.
Setup Duck DNS
Assuming you want to host yourself at home and don’t have a Static IP (most residential connections won’t unless you paid for it), you will need a way to update the DNS nameserver with your newest Public IP. IP’s usually have a lease time and they change over time.
DuckDNS is free. Use this page to set it up for architecture of your choice. https://www.duckdns.org/install.jsp
Start Ngnix Proxy Manager
The FindMyCat cloud repository has the docker compose file to start a Ngnix Proxy Manager container. Run:
docker-compose -f docker-compose.ngnix-proxy.yml up -dLogin to Ngnix Proxy Manger
Use the following default login; you will be prompted to change these credentials after first login.
login: admin@example.com
password: changeme
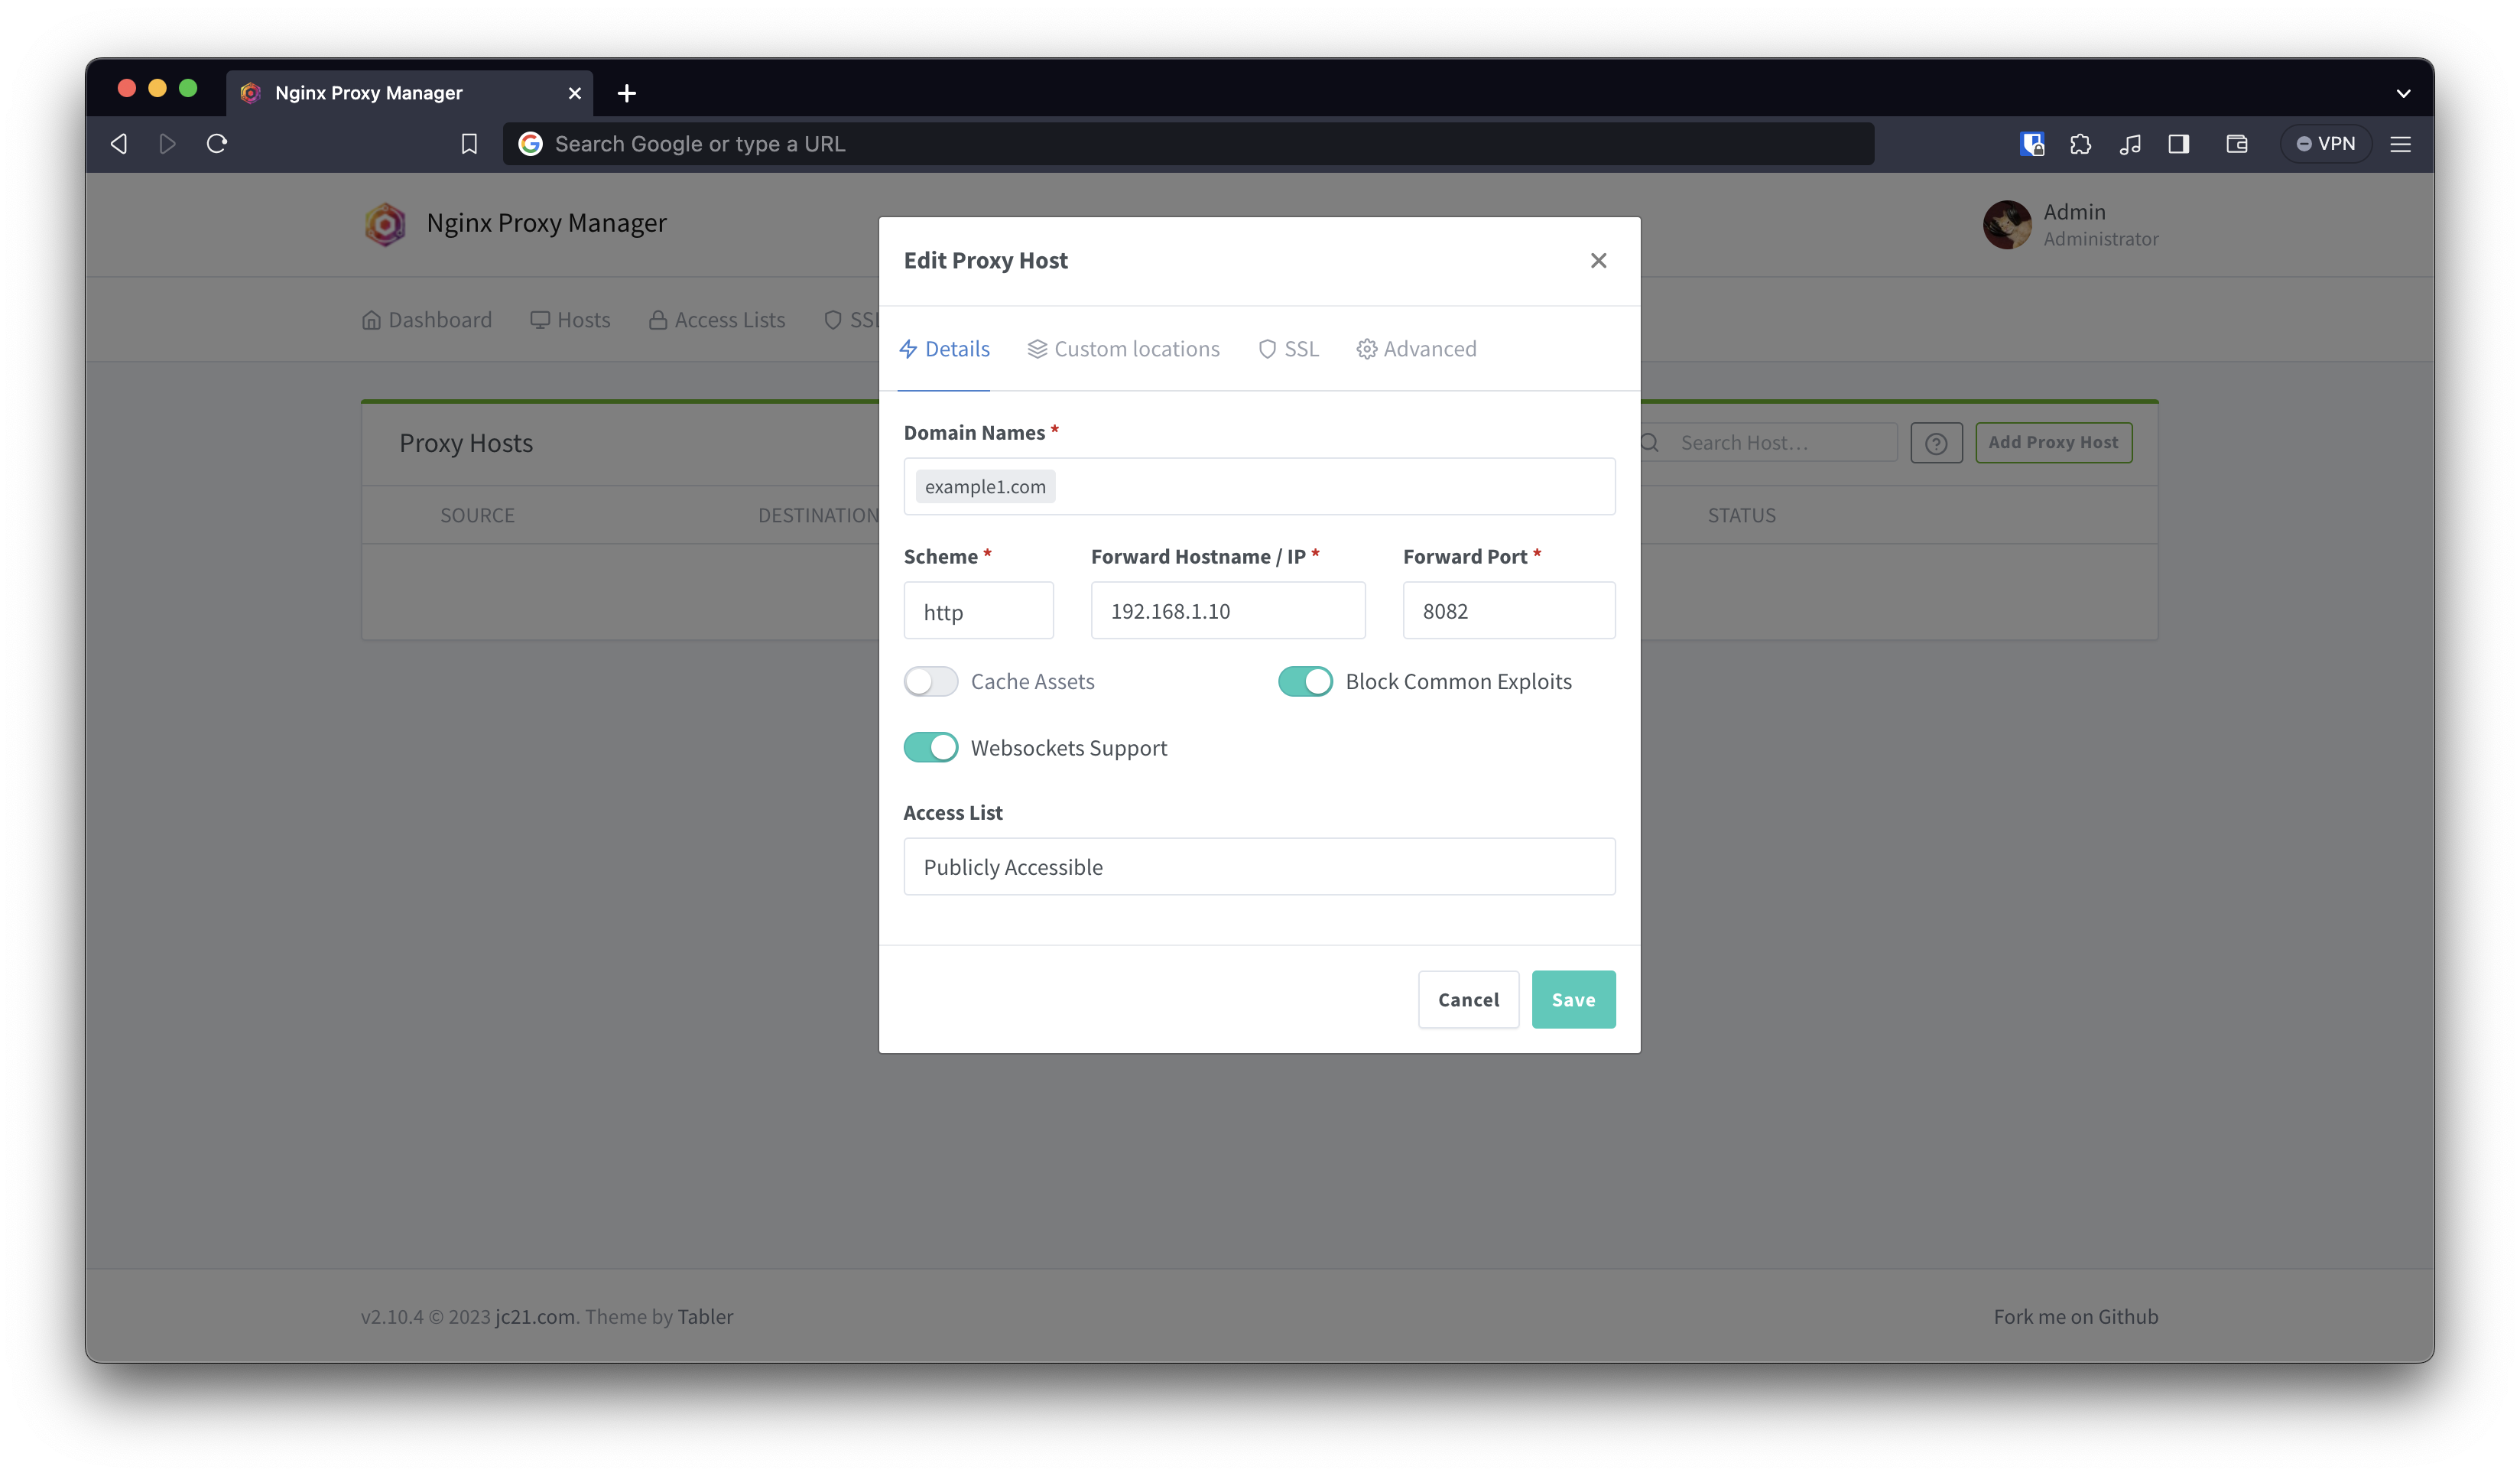
Setup Proxy Host for Traccar
We’re primarily using Ngnix Proxy Manager to expose the Traccar server container using the domain name from step above (DuckDNS).
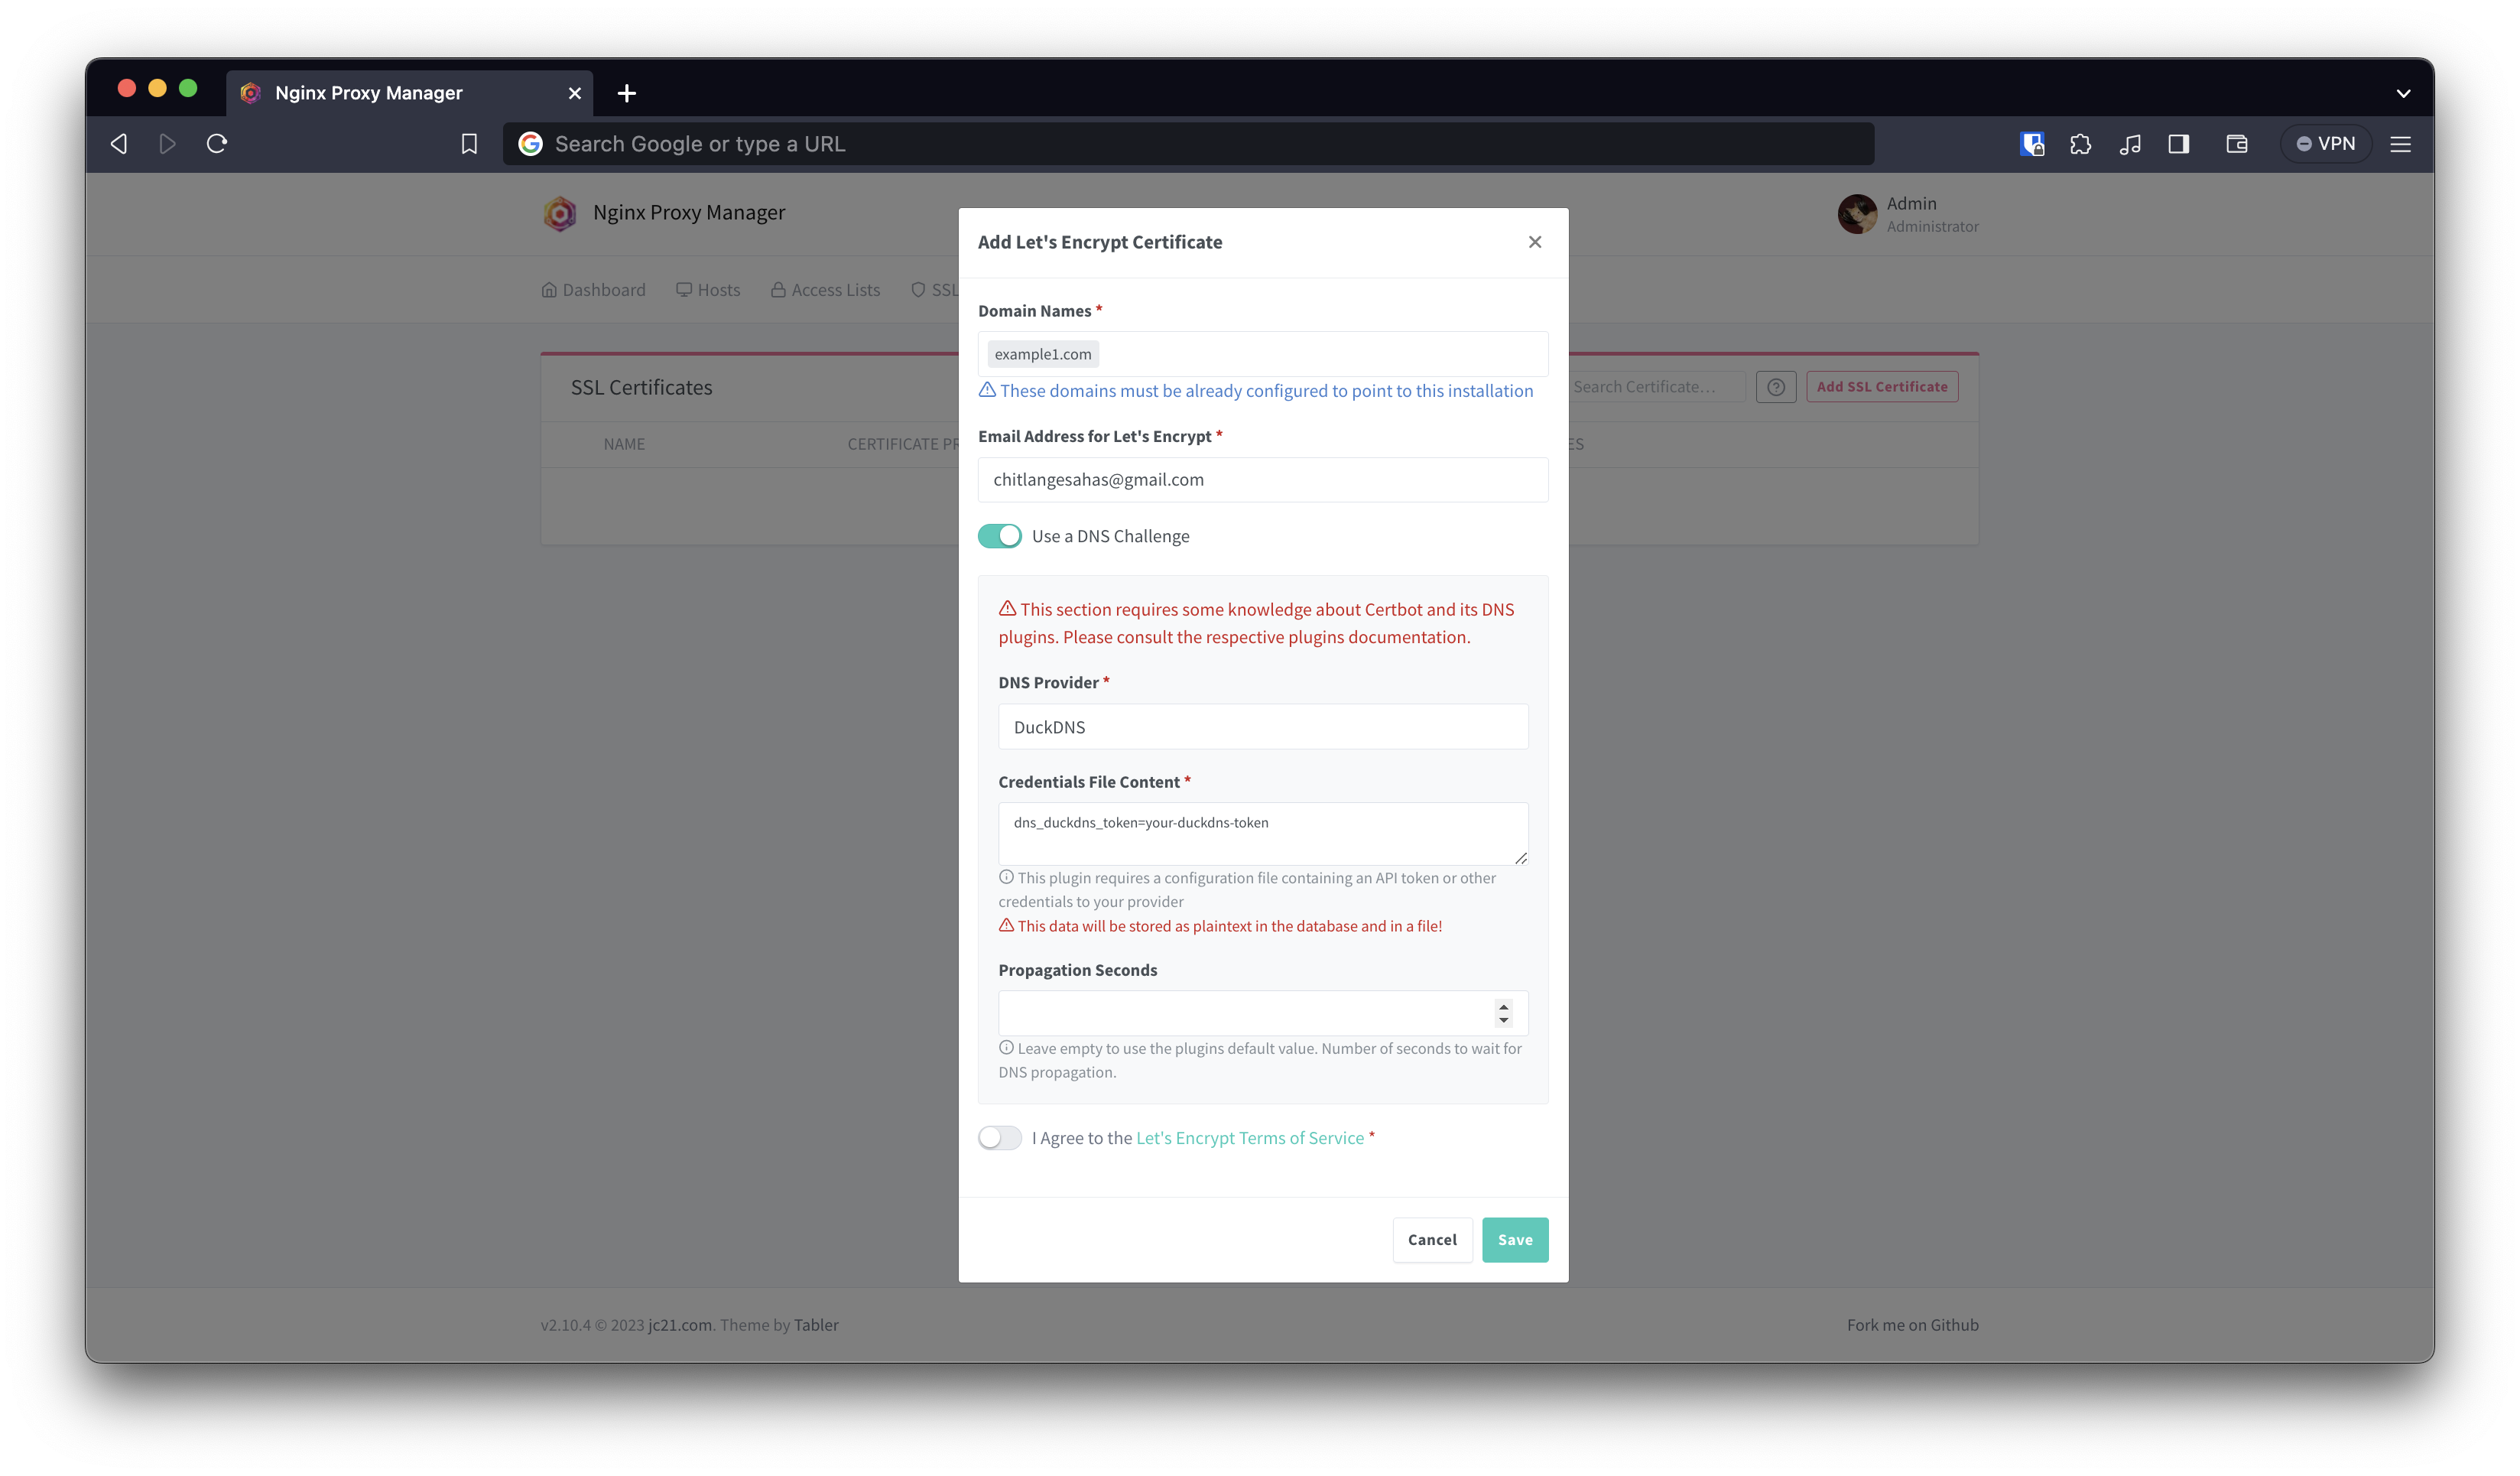
Setup SSL
To enable SSL Ngnix Proxy Manager has an easy way to setup certificates from within the UI. Click on certificates tab, and add a new Certificate.
Add your DuckDNS hostname and select Use a DNS Challenge. After selecting DuckDNS as Domain Provider and using your DuckDNS token, you should be able to generate a certificate.
Link this new SSL certificate to the Host Proxy under Edit options.